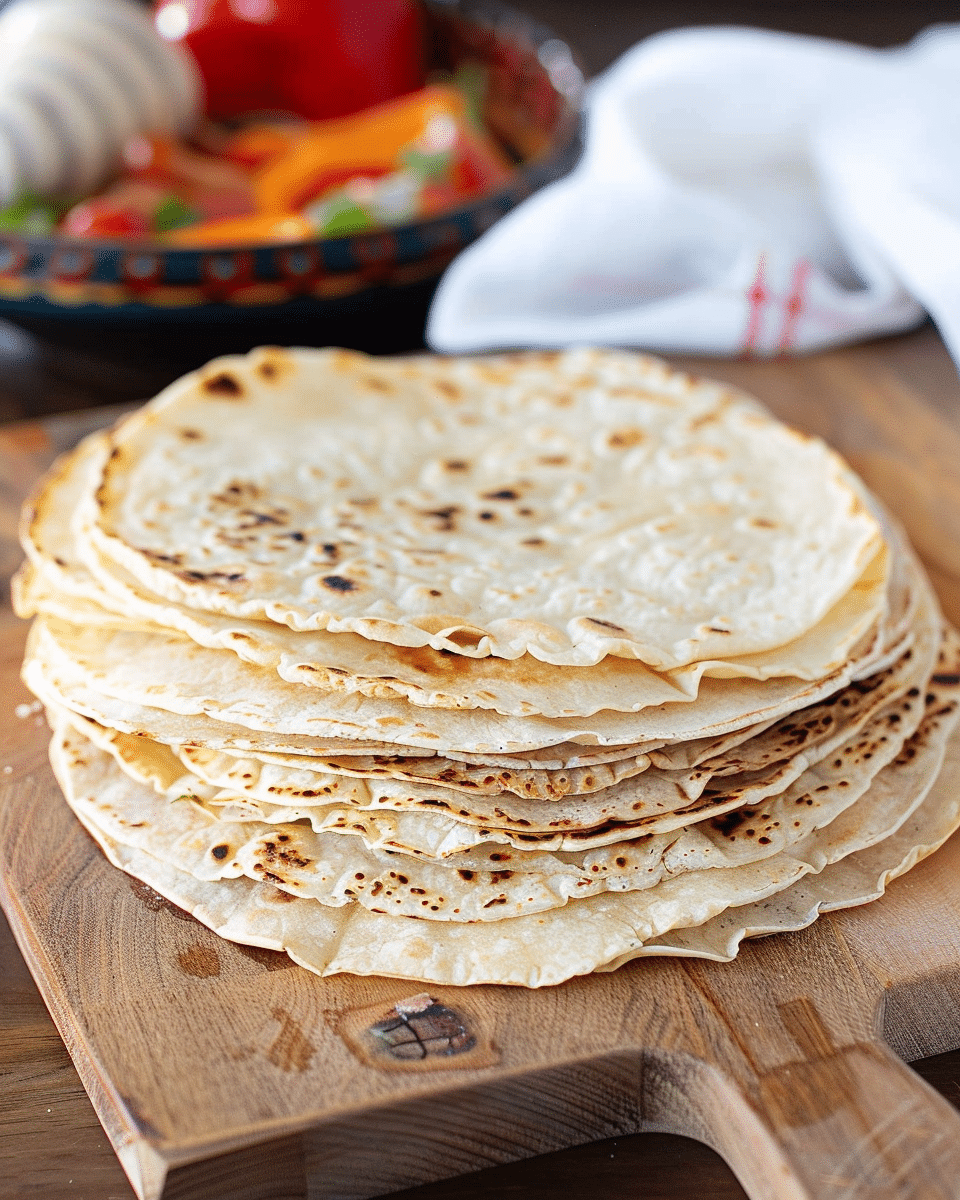
These homemade flour tortillas are the perfect combination of simplicity and flavor. Made with just a few basic ingredients, these tortillas are healthier. They’re soft, pliable, and incredibly versatile—ideal for everything from tacos and burritos to quesadillas or even as a side for your favorite dishes. The best part? These tortillas require no fancy equipment like a tortilla press—just a rolling pin and your hands! You can enjoy them fresh, or store them for later use.
Why You’ll Love This Recipe
Homemade tortillas are a game-changer! They have a tender, pillowy texture that store-bought tortillas just can’t match. The use of coconut oil makes these tortillas a healthier option, while still maintaining that soft, slightly chewy consistency we all love. Plus, making them at home means you get to control the ingredients, making them vegan and vegetarian-friendly. With these simple tortillas, you can impress your family, guests, or even yourself with how easy and delicious homemade bread can be.
Ingredients for Flour Tortillas
This recipe uses basic pantry staples and coconut oil for a healthier, plant-based twist.
-
3 cups (384 grams) all-purpose flour
-
2 teaspoons baking powder
-
1 teaspoon salt
-
⅓ cup (70 grams) unrefined/unflavored coconut oil, room temperature
-
1 cup (236 ml) hot water
How to Make Flour Tortillas
Step 1: Prepare the Dough
In a large mixing bowl, combine the flour, baking powder, and salt. Mix them well. Add the coconut oil and rub it into the flour using your fingers, similar to making pie dough. Drizzle in a little hot water at a time, mixing with a fork until the dough starts to come together. Switch to using your hands and knead the dough until it forms a smooth, elastic ball. If the dough is too sticky, sprinkle in a little more flour; if it’s too dry, add a tiny bit more water.
Step 2: Knead and Rest
Turn the dough out onto a lightly floured surface and knead for 4-5 minutes, until it’s smooth and elastic. Divide the dough into 16 equal-sized balls. Place the balls in a bowl and cover them with a damp cloth. Let the dough rest for about 10 minutes to allow the gluten to relax.
Step 3: Roll the Tortillas
Preheat a cast-iron skillet or non-stick pan over medium-high heat. On a lightly floured surface, take one dough ball and roll it out with a rolling pin into a 5½-inch (14 cm) round. Try to keep the thickness uniform, but don’t worry if it’s not a perfect circle—the rustic look adds charm!
Step 4: Cook the Tortillas
Place the rolled-out tortilla onto the hot skillet. After a few seconds, you’ll see the dough start to bubble. Flip it over when you notice bubbles forming on the surface, and cook for about 30 more seconds until lightly golden. Remove the tortilla from the skillet and wrap it in a towel to keep it warm and soft. Repeat with the remaining dough balls.
Step 5: Serve
Once all the tortillas are cooked, they’re ready to be served! These soft tortillas can be used for tacos, wraps, or anything else that calls for a great tortilla.
Tips for Success
-
Use hot water: Hot water helps make the dough soft and pliable, resulting in perfectly tender tortillas.
-
Don’t overwork the dough: Knead the dough until smooth and elastic, but don’t overdo it, or the tortillas might become tough.
-
Rest the dough: Let the dough rest for 10 minutes. This step is key to achieving a more pliable dough that’s easier to roll out.
-
Rolling Tips: If you don’t have a tortilla press, use parchment paper or a plastic bag to help roll the dough evenly and prevent it from sticking.
-
Cooking Tip: Don’t overcook the tortillas. They should be lightly golden, but not crispy.
Storing Flour Tortillas
-
Room Temperature: If you plan to eat the tortillas within a few days, store them in a sealed plastic bag or wrapped in a clean kitchen towel to keep them soft.
-
Refrigerate: If you’re storing them for longer, place them in an airtight container or a resealable plastic bag. They will keep in the fridge for up to a week.
-
Freeze: For long-term storage, freeze the tortillas. Place a piece of parchment paper between each tortilla to prevent them from sticking together. They can be frozen for up to 3 months. To reheat, simply warm them on a skillet or microwave.
Make-Ahead Tips
You can make the dough ahead of time and store it in the refrigerator for up to 2-3 days. When you’re ready to use it, let the dough come to room temperature for about 30 minutes before rolling it out. You can also freeze the dough after it has rested and divide it into individual portions before wrapping it tightly in plastic wrap.
Conclusion
These Flour Tortillas are a healthier, simple, and delicious alternative to store-bought versions. They’re soft, pliable, and full of flavor, making them the perfect companion to any filling or dip. With just a few ingredients and some easy techniques, you’ll have fresh, homemade tortillas in no time! Enjoy them as part of your favorite Mexican dishes or with any meal that calls for a great tortilla.
Print
Homemade Flour Tortillas
- Total Time: 12 minutes
- Yield: 16
Description
These Flour Tortillas are easy, healthier! Using coconut oil as a substitute, these soft and pliable tortillas are perfect for tacos, burritos, or wraps. Made in just a few minutes with simple ingredients, you won’t need a tortilla press to get perfectly round and delicious tortillas.
Ingredients
3 cups (384 grams) all-purpose flour
2 teaspoons baking powder
1 teaspoon salt
⅓ cup (70 grams) unrefined/unflavored coconut oil, at room temperature
1 cup (236 ml) hot water
Instructions
Mix Dry Ingredients
In a mixing bowl, combine the flour, baking powder, and salt. Mix them well to ensure even distribution.
2. Add Coconut Oil
Add the coconut oil into the dry mixture. Use your hands to rub the coconut oil into the flour until the mixture has a crumbly texture. This will help give the tortillas their soft and pliable texture.
3. Form the Dough
Slowly drizzle in the hot water while stirring with a fork. Add water little by little until the dough starts to form a ball. Once it starts coming together, switch to using your hands and knead until the dough is smooth and slightly tacky but not sticky. If the dough feels too sticky, add a small amount of flour. If it’s too dry, add a tiny bit more water.
4. Rest the Dough
Divide the dough into 16 equal balls. Place them in a bowl, cover with a damp cloth, and let the dough rest for 10 minutes. This resting time will make the dough more pliable and easier to roll out.
5. Roll Out the Dough
Preheat a cast-iron skillet over medium-high heat. On a lightly floured surface, use a rolling pin to roll each dough ball into a 5 ½-inch (14 cm) round. Try to keep the tortilla thin and even. You can also use parchment paper or plastic to prevent sticking as you roll.
6. Cook the Tortillas
Place the rolled tortilla onto the hot skillet. Cook for about 30 seconds until you see bubbles start to form. Flip the tortilla and cook for another 30 seconds on the other side. The tortilla should be slightly golden but not browned.
7. Store the Tortillas
Once cooked, remove the tortilla from the skillet and wrap it in a clean kitchen towel to keep it warm. Repeat the process with the remaining dough balls.
Notes
Use hot water: It helps activate the gluten and makes the dough softer.
Don’t overwork the dough: Knead the dough just until smooth and slightly tacky. Over-kneading can make the tortillas tough.
Resting the dough: Allowing the dough to rest helps relax the gluten, making the tortillas more pliable.
Rolling Tips: You don’t need a tortilla press. Use a rolling pin and gentle, even pressure. Rotate the dough as you roll it to keep it round.
Cooking Tip: Use a cast-iron skillet for the best results, as it ensures even heat and slightly crispy edges.
Storing Tortillas
Room Temperature: If you plan to use the tortillas within a few days, store them in a plastic bag or wrapped in a kitchen towel.
Refrigeration: For longer storage, refrigerate the tortillas in a resealable plastic bag or an airtight container. They can last up to 1 week in the fridge.
Freezing: You can freeze tortillas for up to 3 months. Place a piece of parchment paper between each tortilla to prevent them from sticking together. Thaw at room temperature or reheat in the skillet.
Serving Suggestions
These Flour Tortillas are perfect for:
Tacos: Fill with your favorite meat, beans, cheese, and toppings.
Burritos: Roll up your favorite fillings like rice, beans, cheese, and grilled veggies.
Wraps: Use them to wrap up sandwiches or fresh veggies for a healthy lunch.
Breakfast Burritos: Fill with scrambled eggs, cheese, and bacon or sausage.
- Prep Time: 10 minutes
- Cook Time: 2 minutes
- Category: Side dishes
- Cuisine: Mexican


